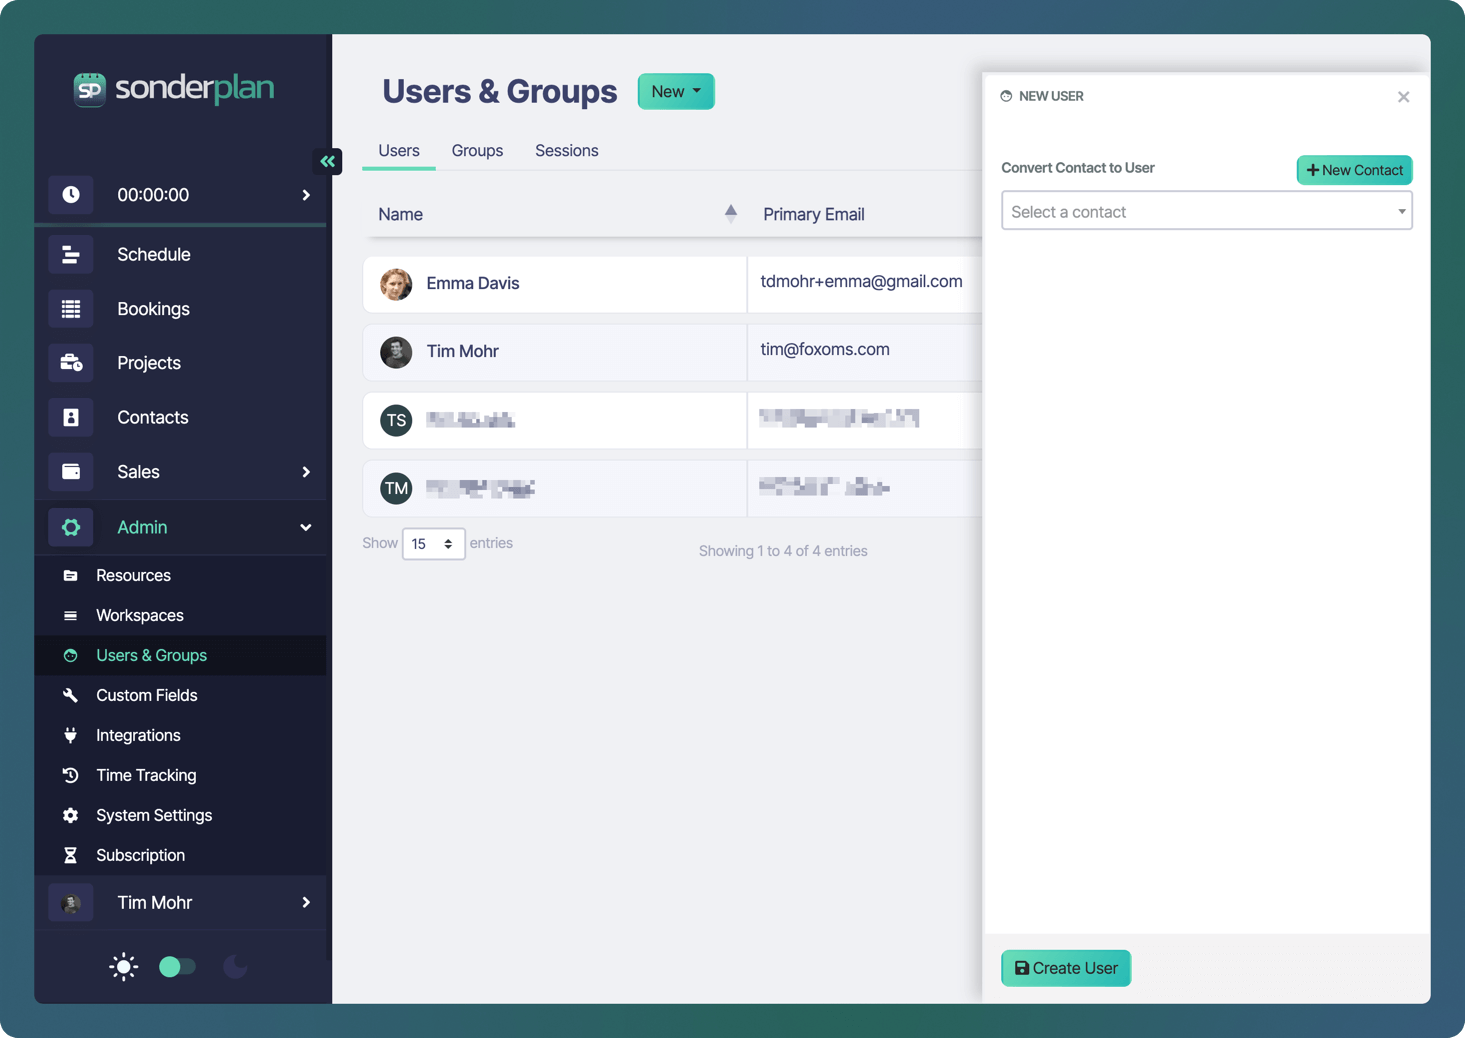
Users
The Users tab shows every user account that can log into Sonderplan.Creating & Editing a User
Next to the Users & Groups heading, click the New button and choose User in the drop-down menu. In the New User editing sidebar, either- Select an existing Contact in the selection menu that you wish to give login access to Sonderplan
- Click New Contact to create a new contact that will also be added as a User to Sonderplan
Primary Email Warning
Users require a Primary Email to be set before they can be created. To set a primary email click on the Open Contact Editor link or button, which will open the Contact Editor.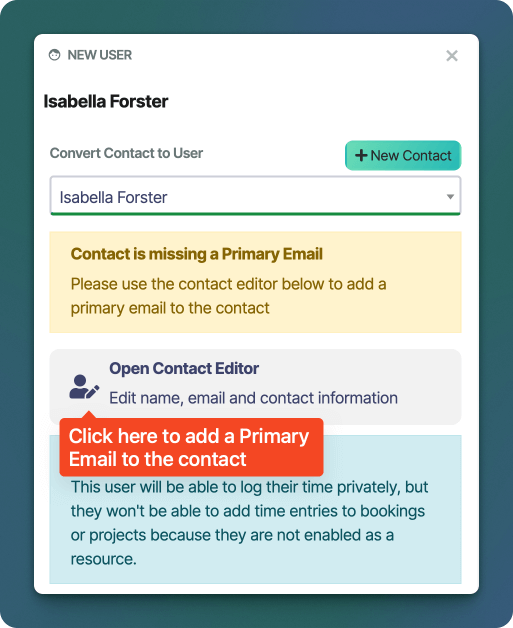
Time Logging Limited Warning
A Time Logging Limited warning will be shown if the user is not also added as a Resource. This user will be able to log their time privately, but they won’t be able to add time entries to bookings or projects until they are enabled as a resource.Send Reset Password Email
The “Send Reset Password Email” action allows administrators to trigger a password reset for a user directly from the Admin → Users → Edit User screen. When clicked, Sonderplan sends an email to the user containing a secure, time-limited link that allows them to set a new password.
When to use this
- A user has forgotten their password
- A new user has been created but has not yet set their password
- You need to prompt a user to update their credentials for security reasons
How it works
- The system generates a unique reset token
- An email is sent to the user’s registered email address
- The user follows the link and sets a new password
- The token expires after a short period for security
Notes
- Clicking the button will open a modal, asking you to verify that you are a human
- If the user does not receive the email, ask them to check spam/junk folders
- Re-clicking the button will invalidate any previous reset links and issue a new one
User Group
Users derive their core module permissions from User Groups. The group selected can either be one of the default, Staff, Administrator or Super Administrator or can be a Custom Group.SAML SSO Login
If you have configured SAML SSO, you can enable each user to use that login method.Expiry Date
Each user can have an expiry date assigned, after which they will no longer be able to login to Sonderplan. This is particularly useful when you have temporary staff or contractors using the system.Deleting a User
Open the User’s edit panel as above. At the bottom-left of the panel, click the button. Confirm the deletion in the prompt.Groups
Groups let you bundle individual accounts into logical teams—so you can grant or revoke access to entire sets of features at once. Instead of assigning permissions one user at a time, you simply give a Group the right to view or edit specific modules (Schedule / Bookings, Projects, Contacts, and more) and any member of that Group automatically inherits those permissions.Default Groups
Sonderplan has 3 default groups setup which cover many common use cases.| Module | Staff | Administrators | Super Administrators |
|---|---|---|---|
| Schedule / Bookings | RW | RW | RW |
| Projects | RW | RW | RW |
| Contacts | RW | RW | RW |
| Sales | — | RW | RW |
| Administrator | — | RW | RW |
| Subscription Management | — | — | RW |
Create & Edit a Group
If you wish to customise access you can create a Custom Group. If you are editing a group, click on the name of the group in the Groups datatable.Only custom groups may be edited
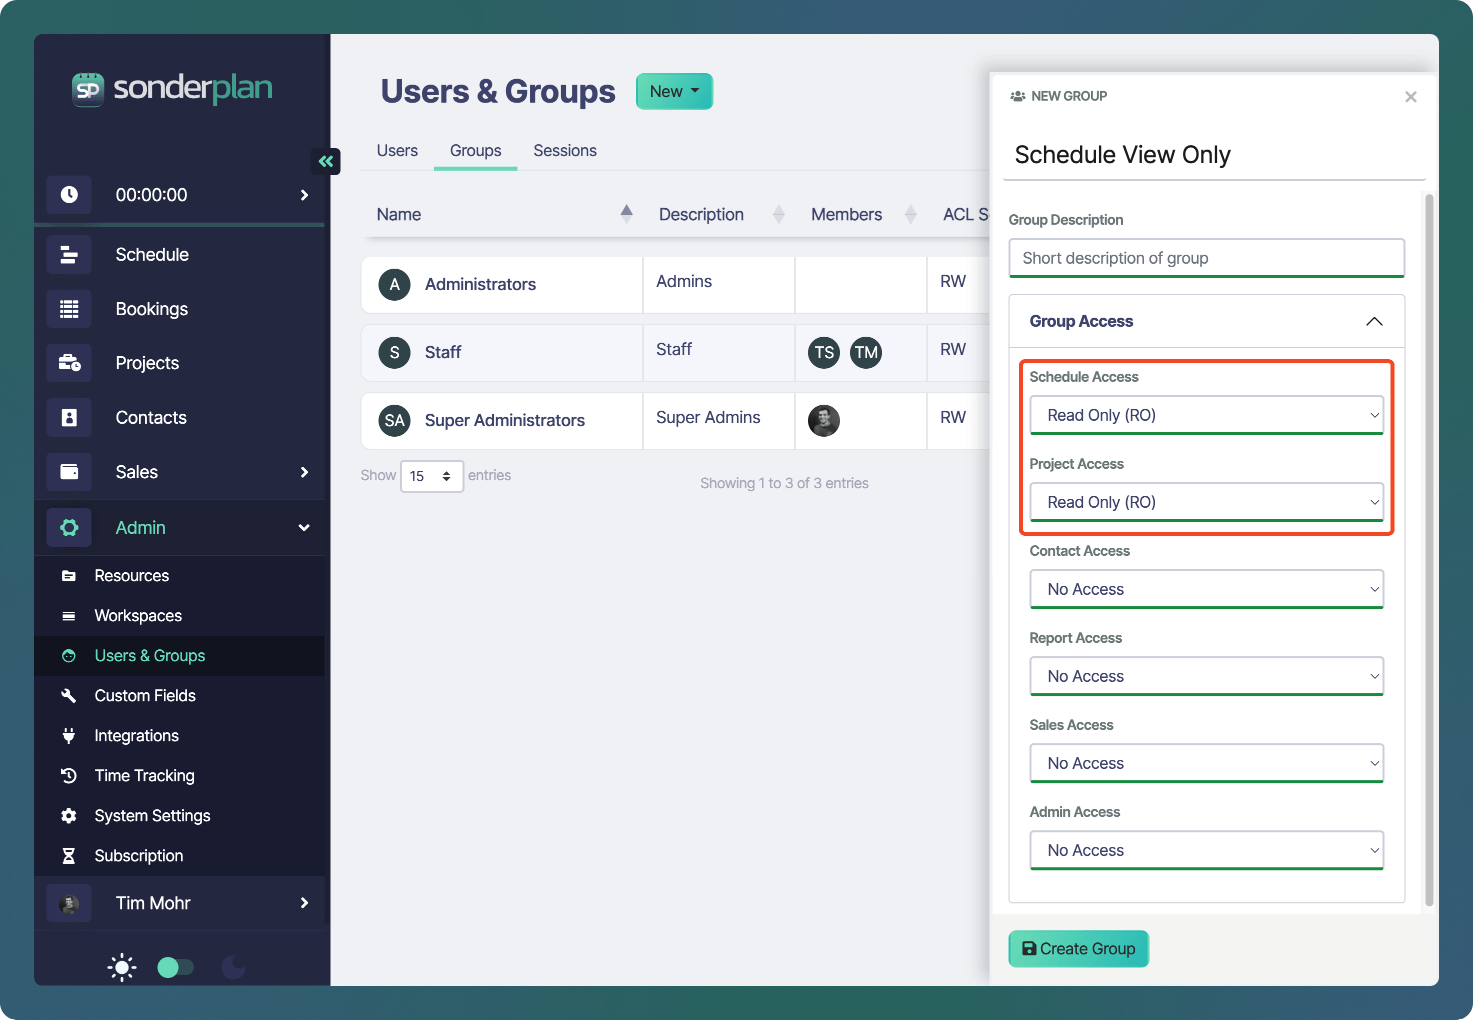
- Enter a Group Name and optional Description for the group.
- For each Module, select the level of access that each member of the group should have.
Delete Group
Only custom groups may be deleted