- Which resources (studios, meeting rooms, equipment, people, etc.) are available
- Who can view and make bookings in that Workspace
Workspaces on the Schedule
To switch between workspaces, go to the top-right corner of the Schedule and click the icon. A menu will appear showing all the workspaces you have access to. Simply click on the name of a workspace to load it into the Schedule—this will replace the currently displayed resources with those from the selected workspace.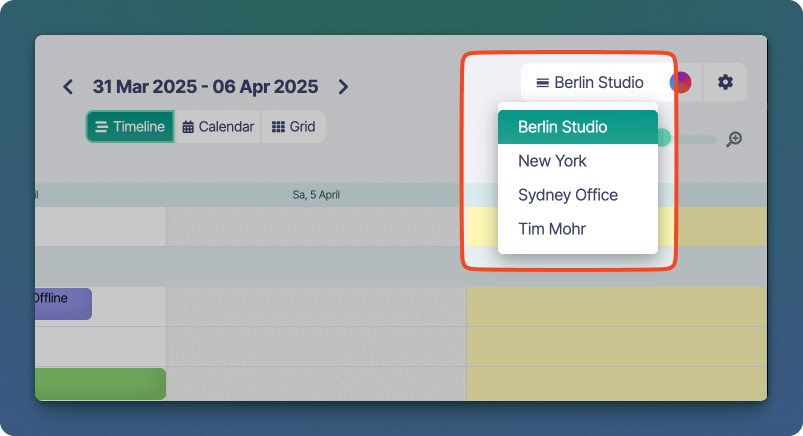
Managing Workspaces
In the main sidebar, click Admin to expand the menu, then select Workspaces. You’ll see a table of all your existing Workspaces, use the table’s sort or search controls to find what you need.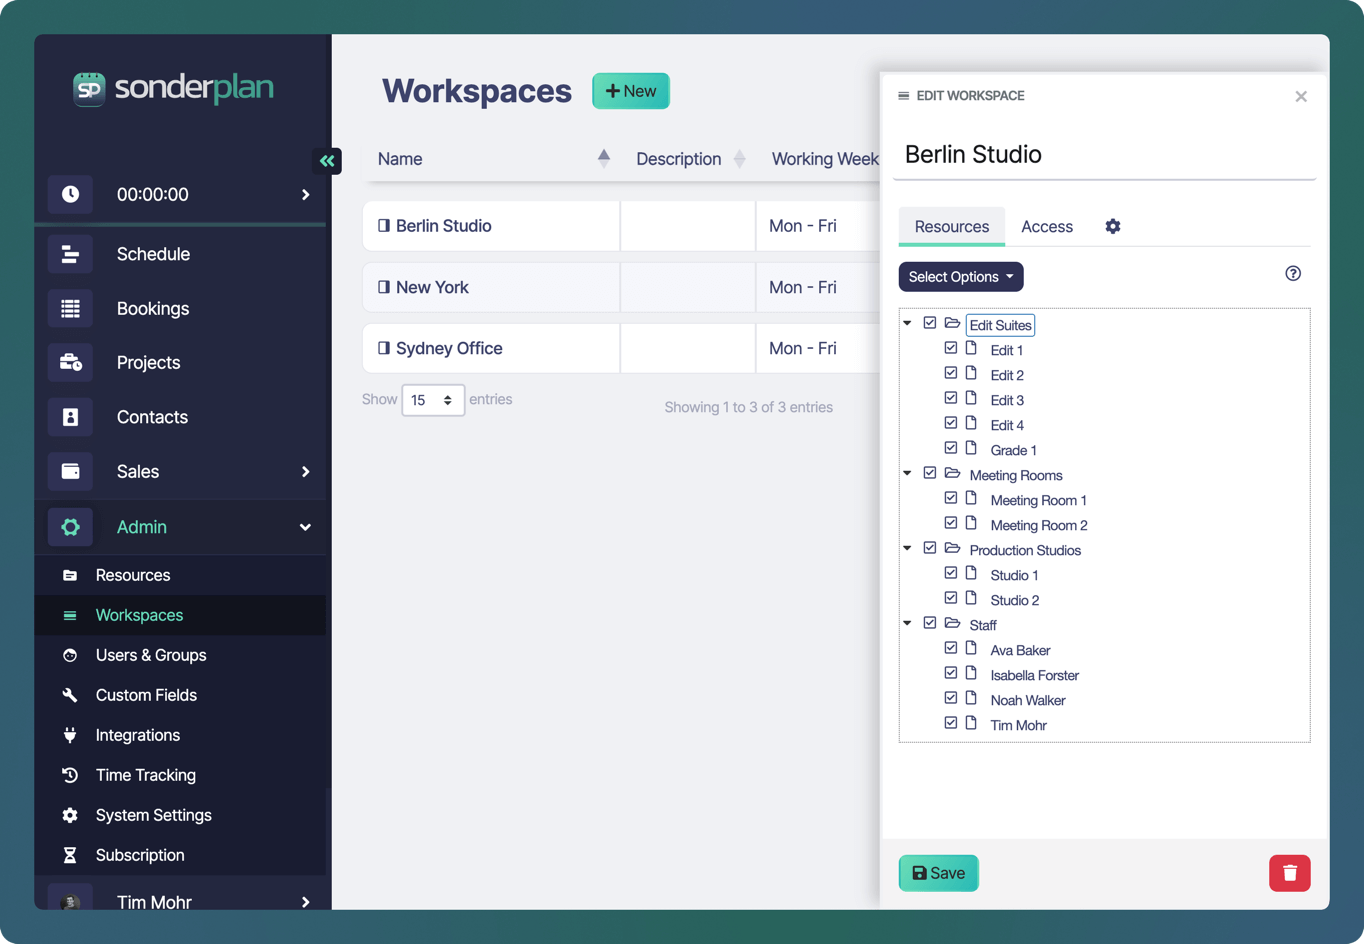
Create a Workspace
From the Workspaces page, click the + New button in the header. In the New Workspace dialog that appears:- Name (required): Give the Workspace a clear, unique title (e.g. “Berlin Studio”).
- Description (optional): Enter a brief summary of what this Workspace represents.
- Working Week: Define the working week for the region that this Workspace resides in, so that weekends are highlighted correctly
- Show Public Holiday: Enter the region that this Workspace resides in, so that region specific holidays are loaded
- Calendar Feed: Enable to create an exportable calendar feed for all bookings that fall within this Workspace
Resources
Switch to the Resources tab and check the folders or individual items that should be bookable in this Workspace (e.g. “Edit Suites → Edit 1, Edit 2,” “Staff → Ava Baker,” etc.).Access
Open the Access tab and assign user or group permissions by checking the View and Edit checkboxes next to each user or group who should see and book these resources.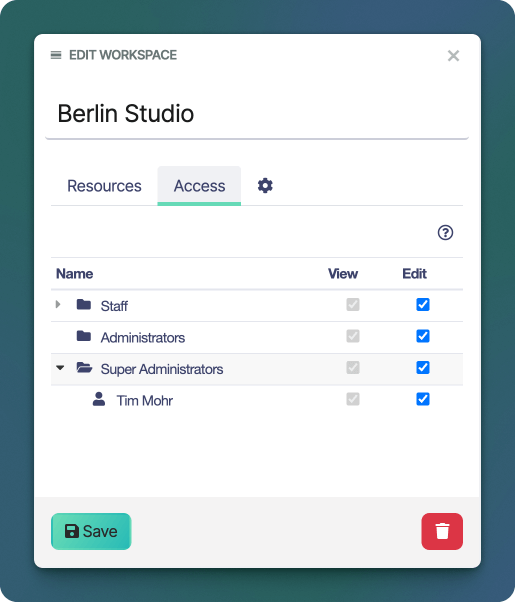
Editing an Existing Workspace
In the Workspaces list, locate the Workspace you want to change and click the name of the Workspace you want to edit The Edit Workspace panel slides in from the right:- Name: You can update the title at any time.
- Resources tab: Add or remove bookable items.
- Access tab: Update which users or groups have permission.
- Settings: Adjust the Description or Working Week if needed.